Officine Bitcoin
Lezioni online Bitcoin-only
This project is maintained by valerio-vaccaro
Officine Bitcoin Bitcoin-only lesson This project is maintained by valerio-vaccaro
🌍 Traduzioni
🇨🇳 中文 🇬🇧 English 🇪🇸 Español 🇵🇹 Português 🇷🇺 Русский 🇫🇷 Français 🇩🇪 Deutsch 🇮🇹 Italiano 🇭🇺 Magyar 🏳️ Milanés 🏳️ Veneto
Installing Debian
We prepare a USB drive with the Debian image downloaded from the official website.
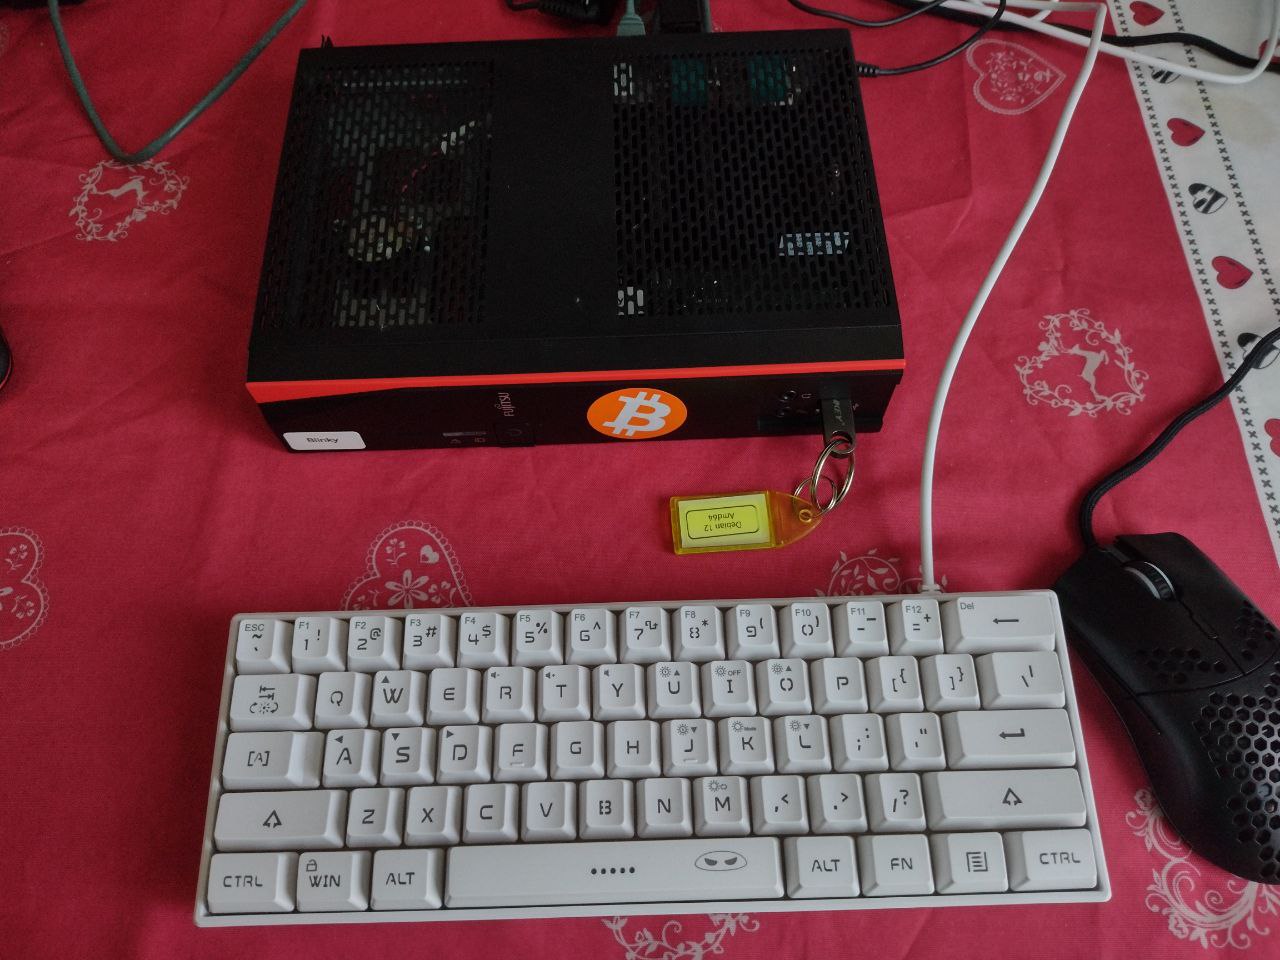
We connect all cables (display, keyboard, mouse, and ethernet).
We connect the USB installation drive.
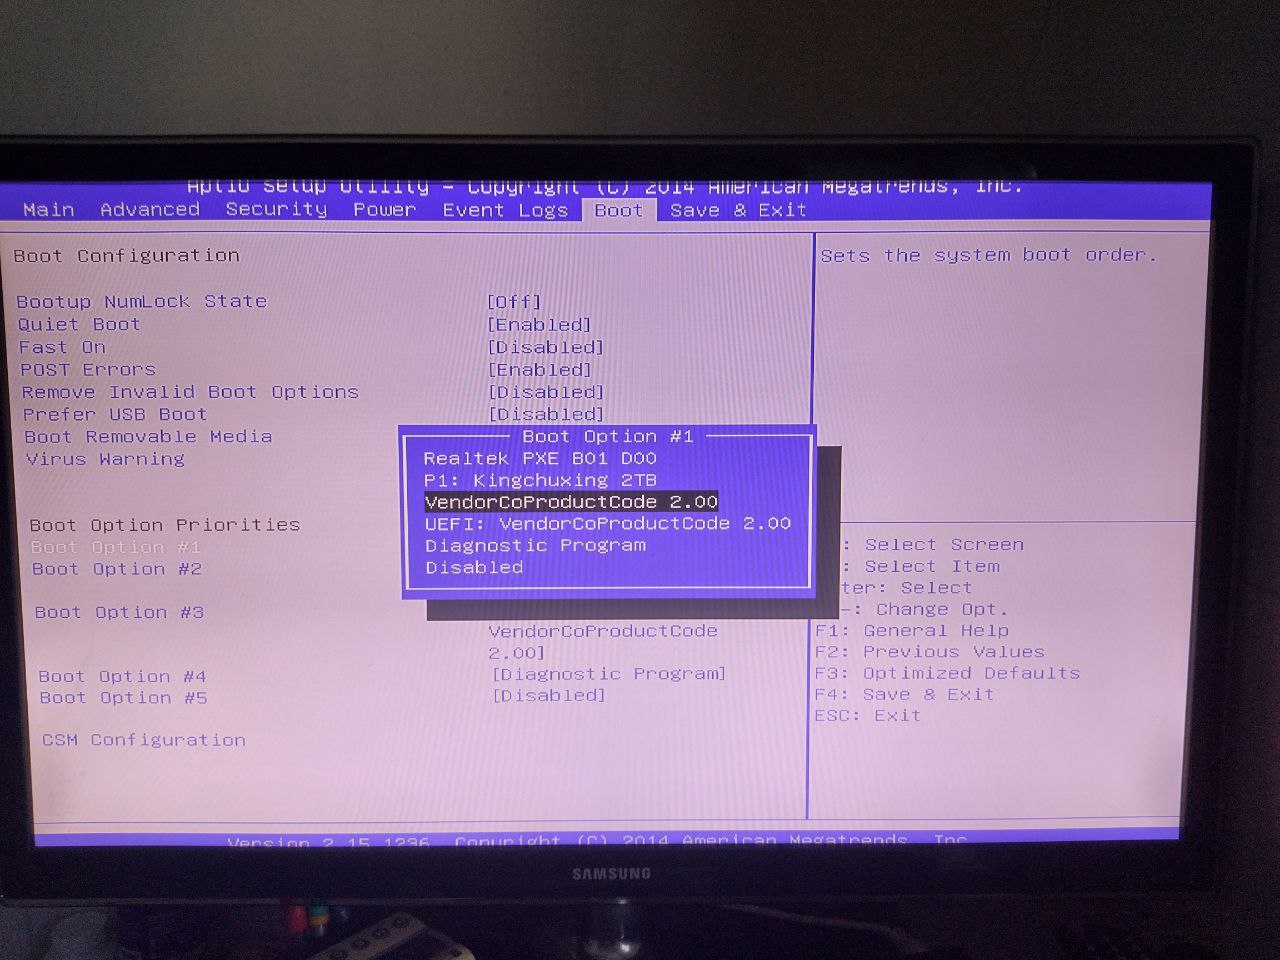
We turn on the computer and make sure our USB drive with Debian boots.
Installation
If everything worked correctly, the Debian installer should start and we’ll end up on the following screen.
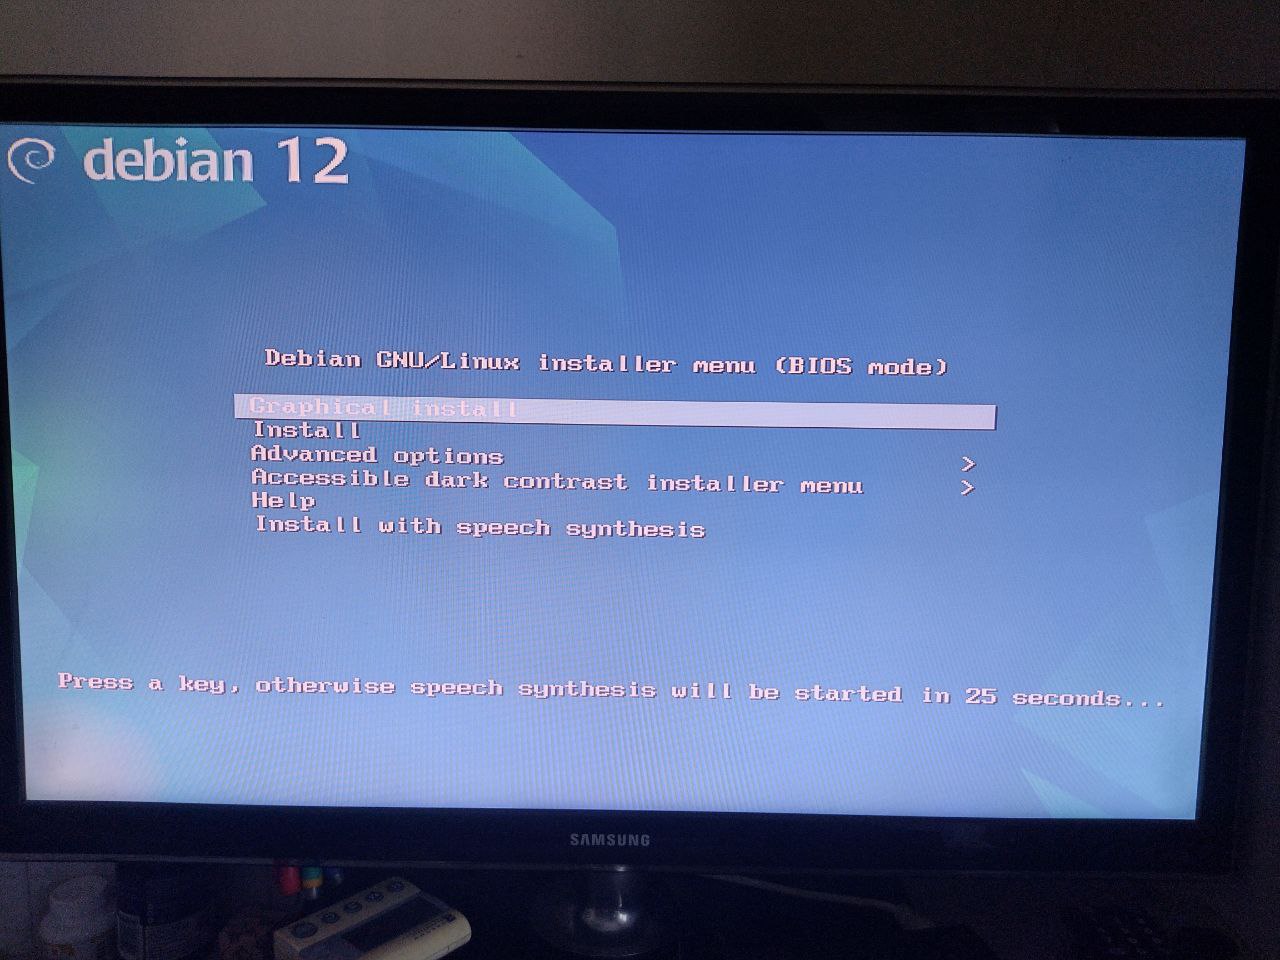
We choose the first line and start the graphical installation.
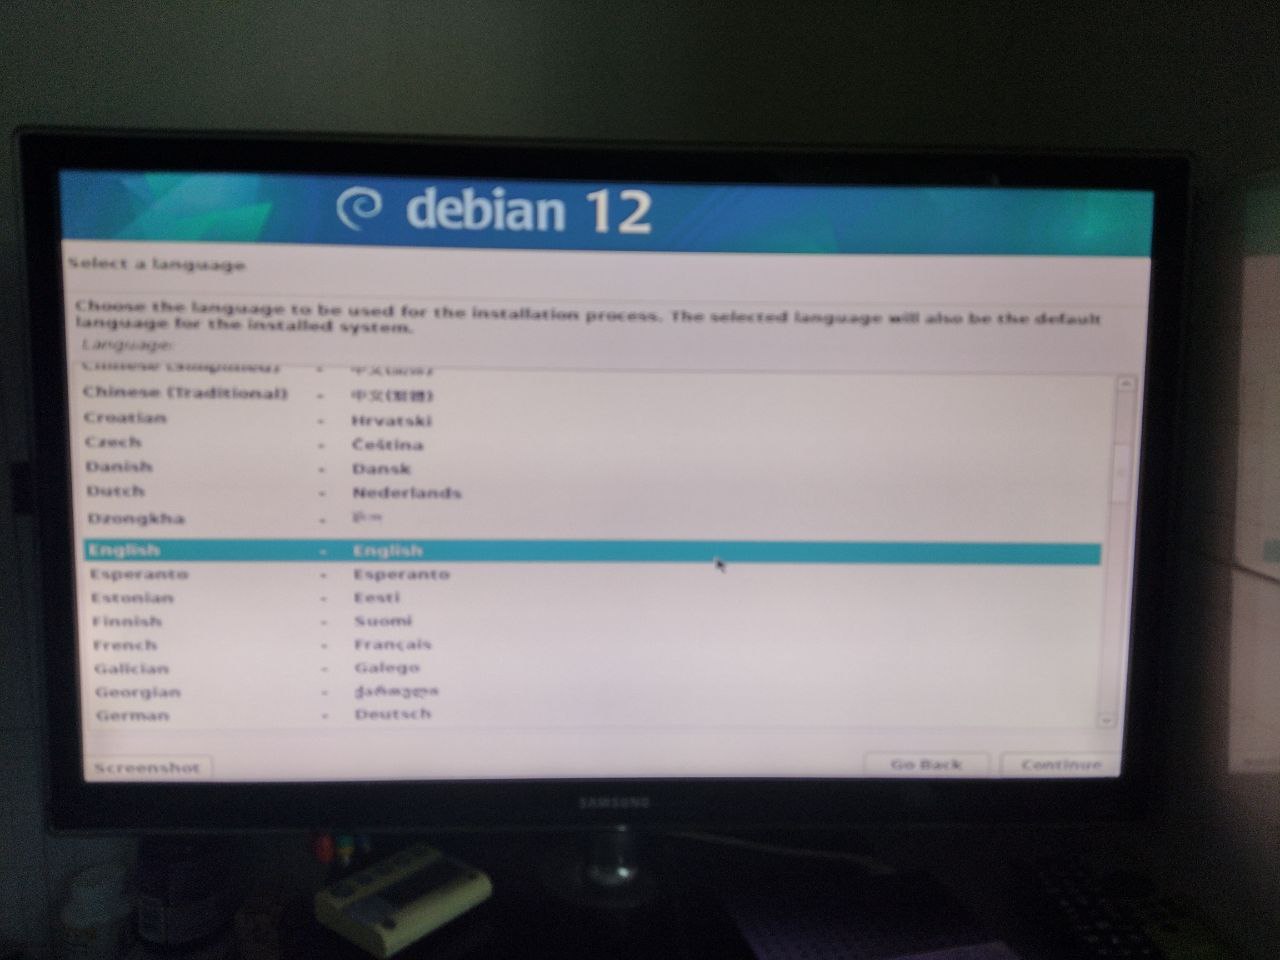
The first thing we’ll be asked is the language; for this installation I’ll choose “English” which I find more understandable than any other translation.
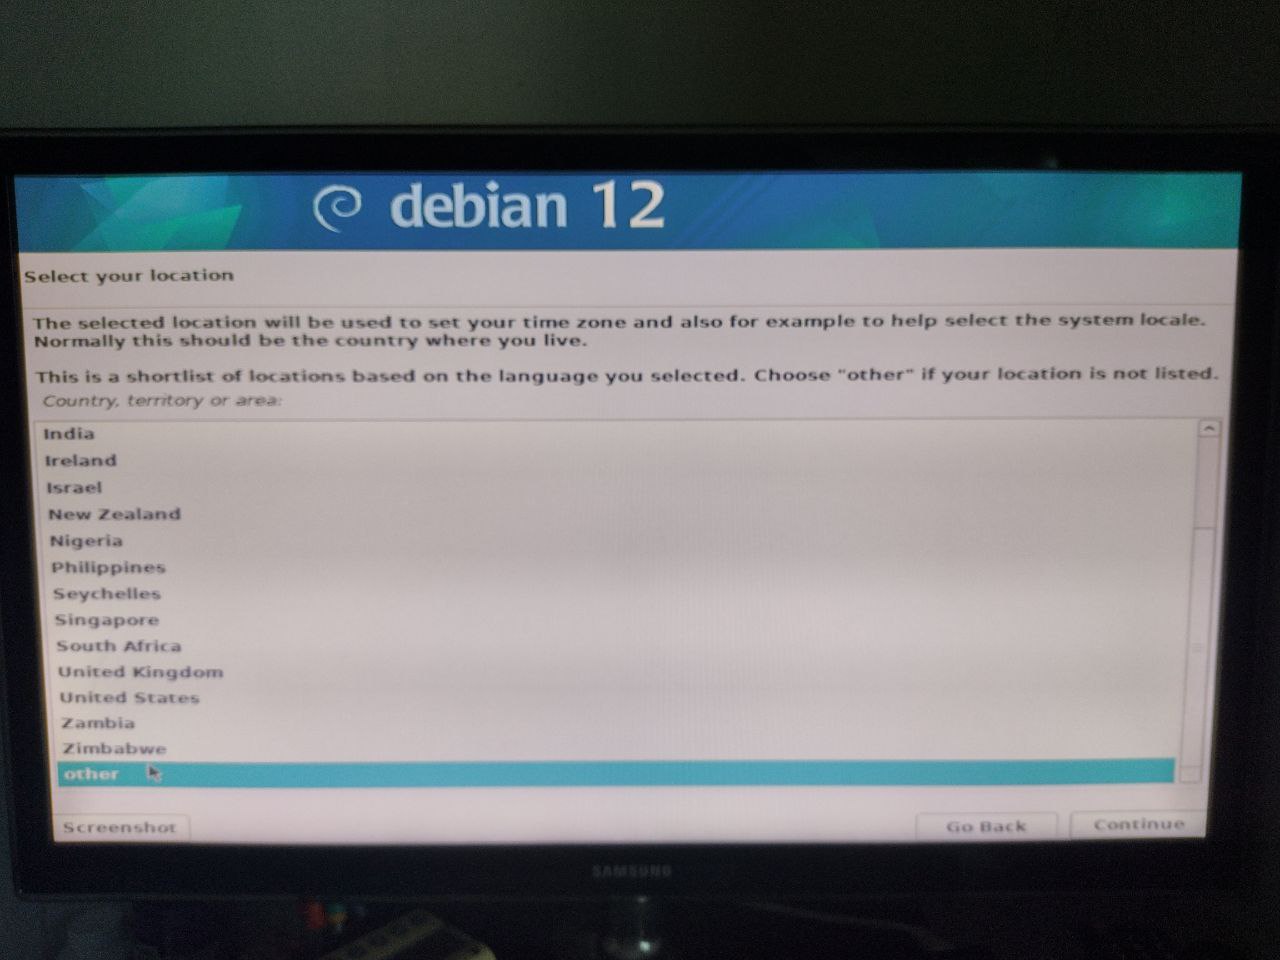
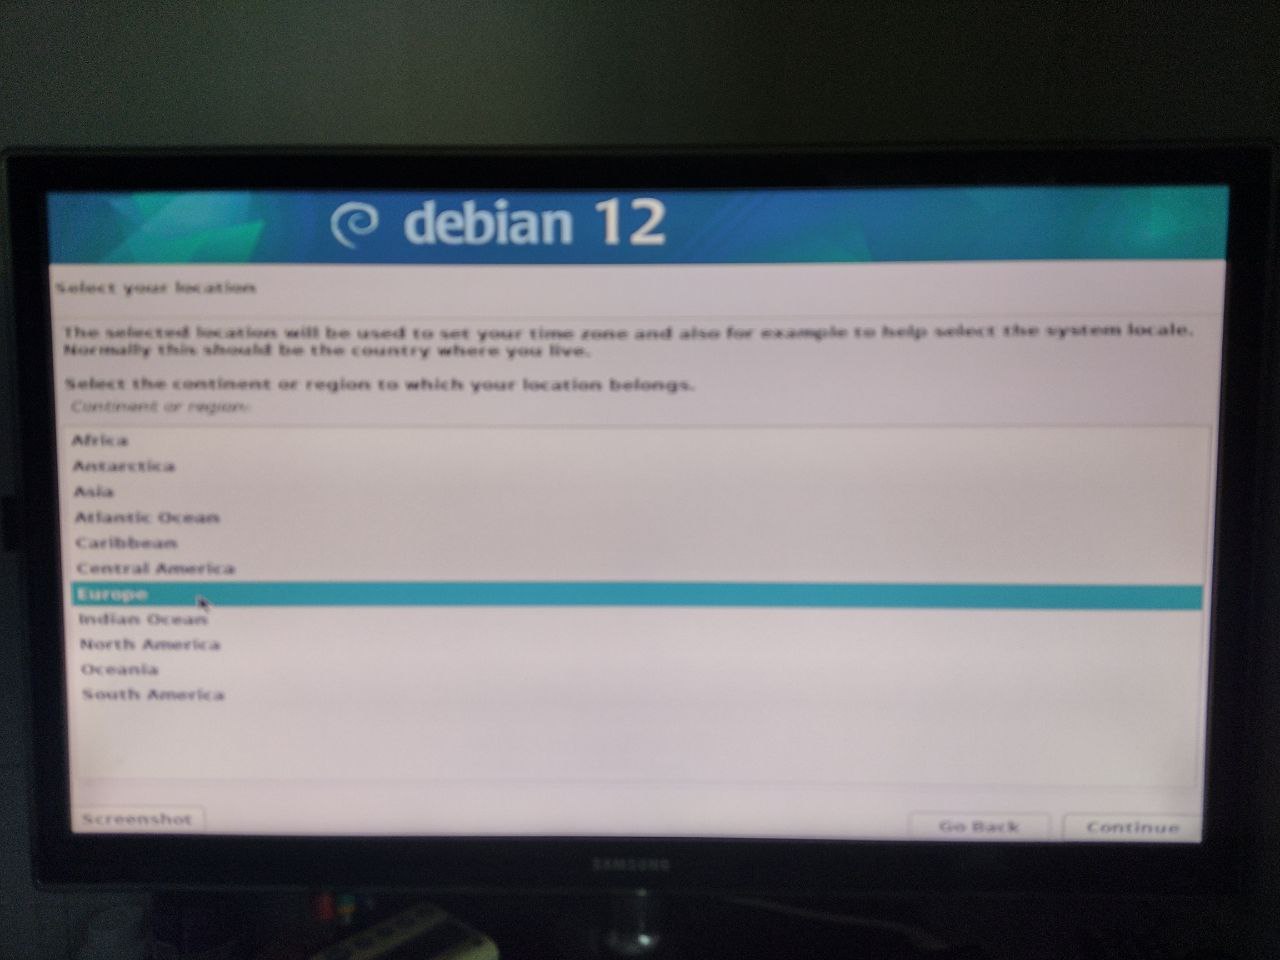
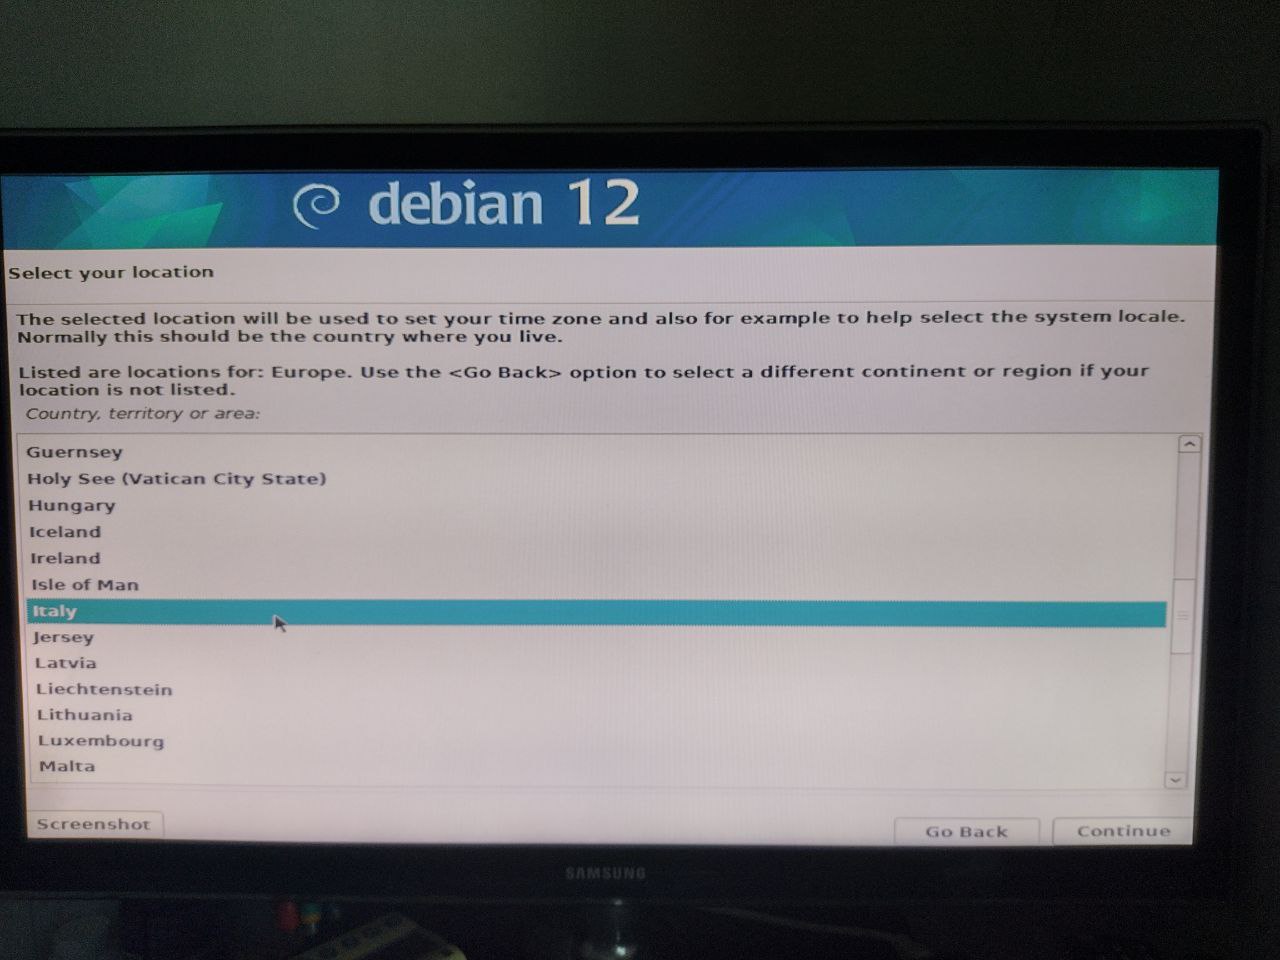
At this point we’ll be asked for our geographical location; to find Italy we need to select OTHER->EUROPE->ITALY.
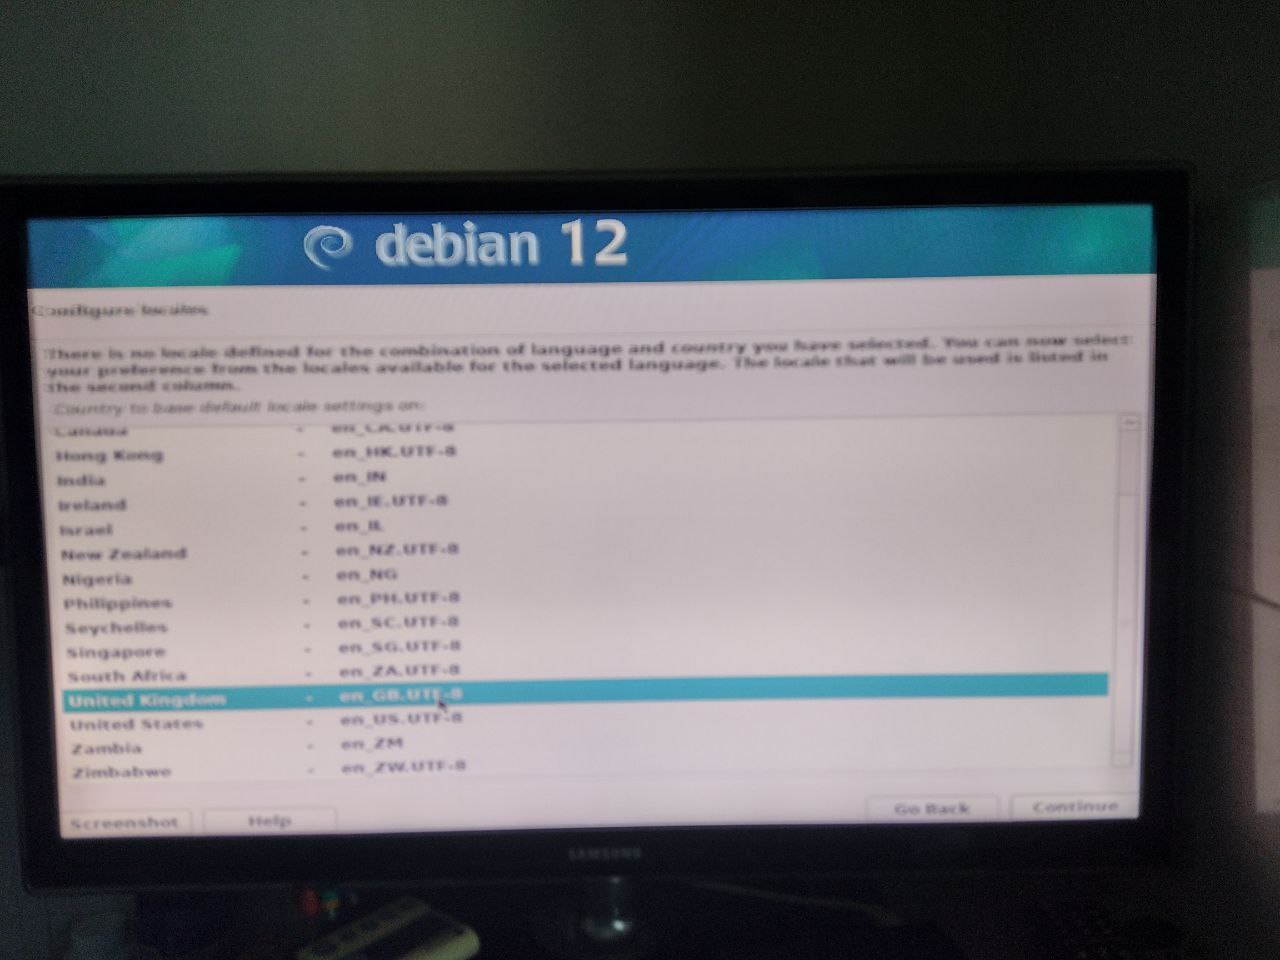
For localization I also choose English here.
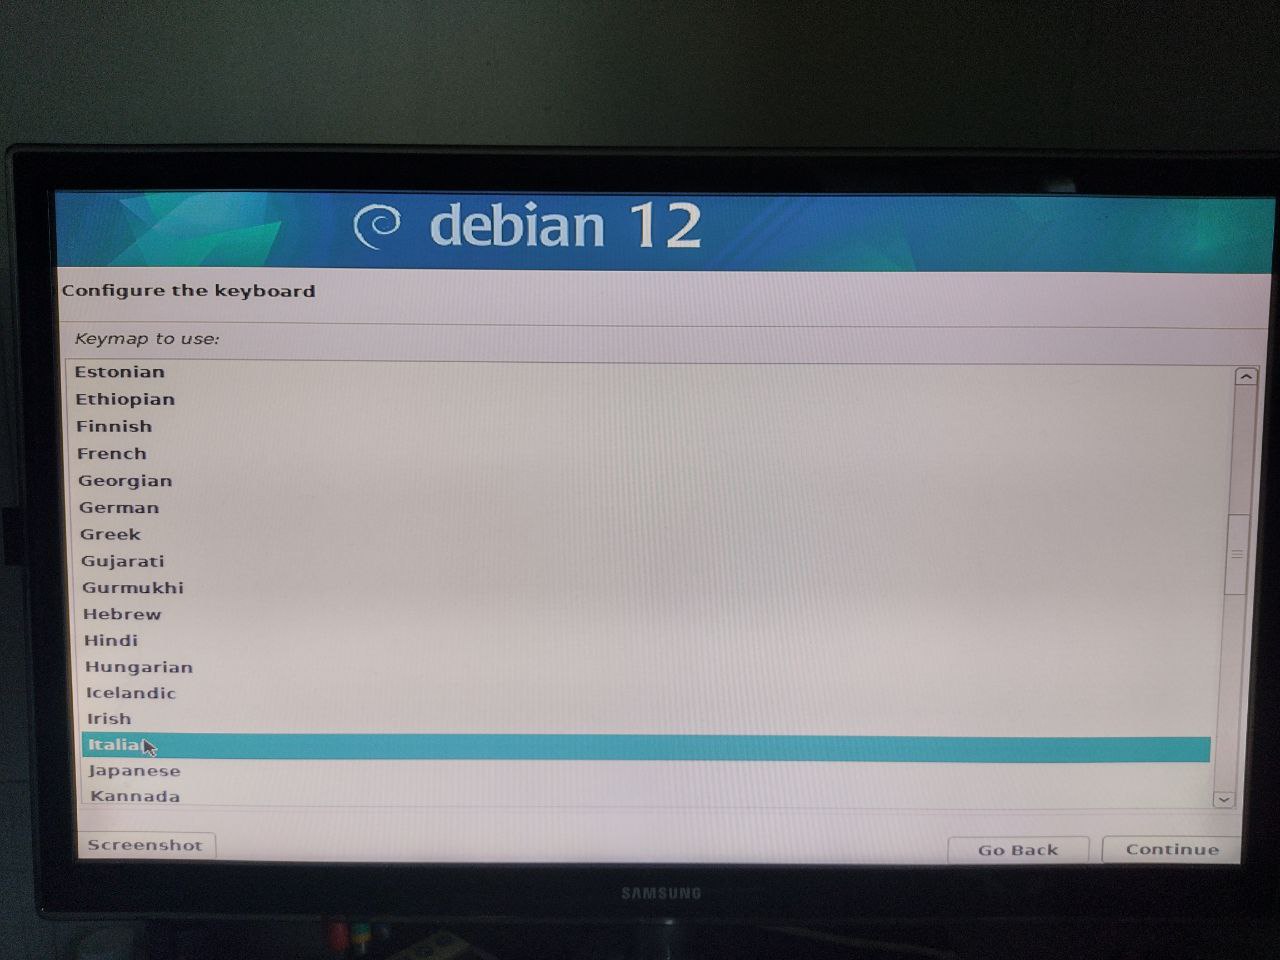
And I configure the Italian keyboard since that’s what I have available.
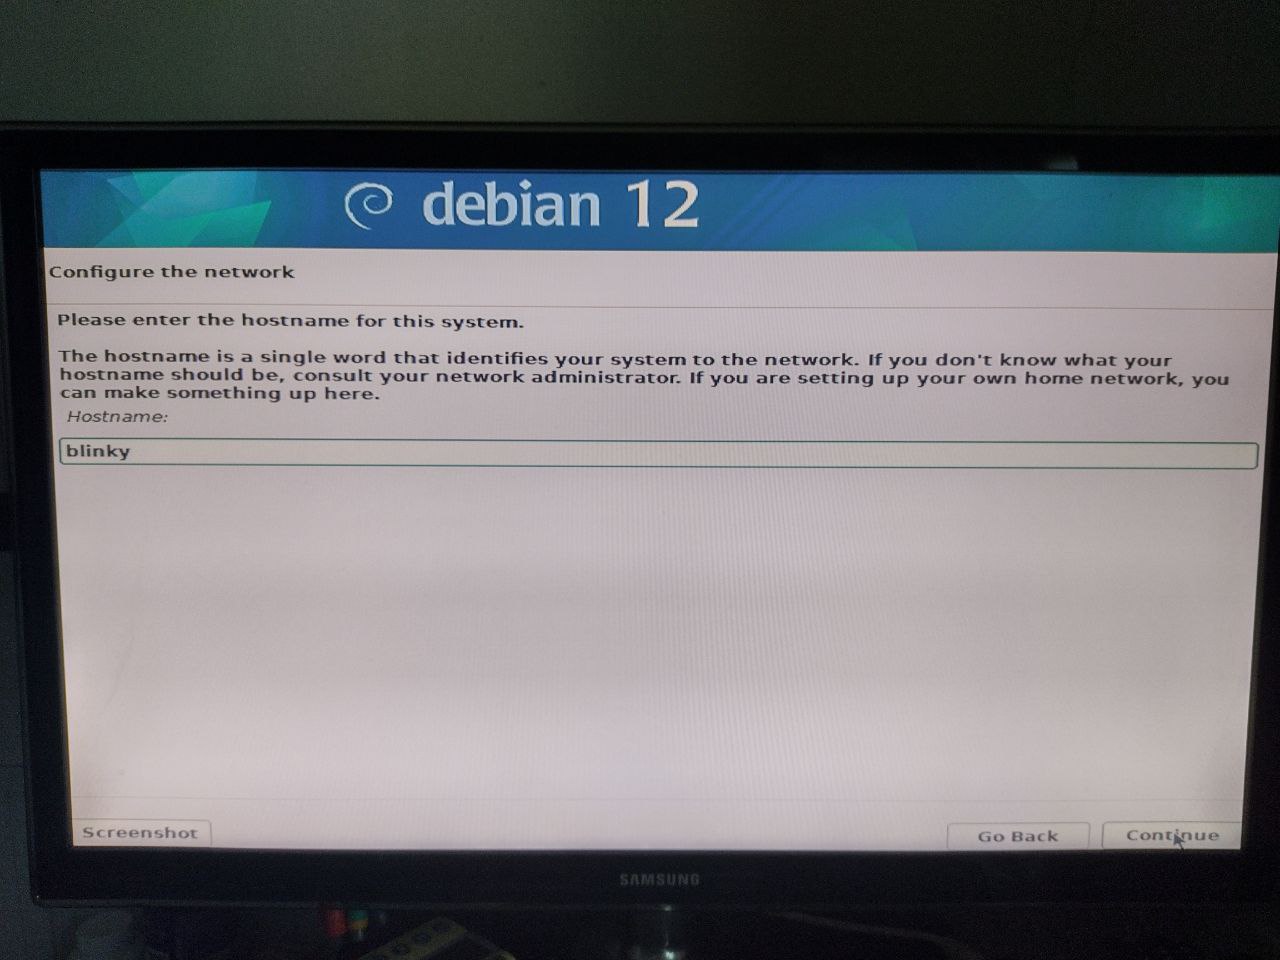
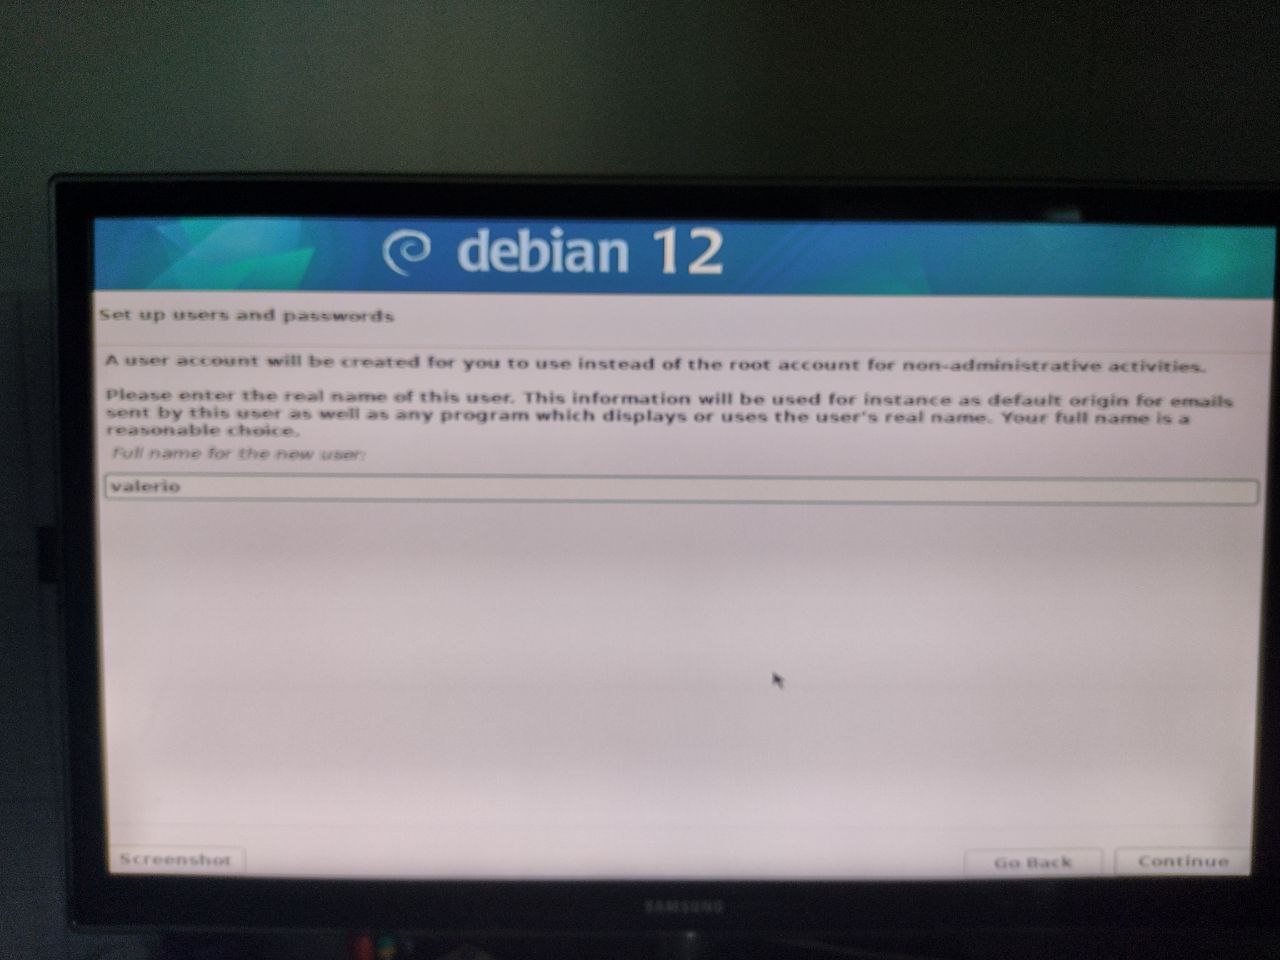
We then choose a username and leave the domain blank.
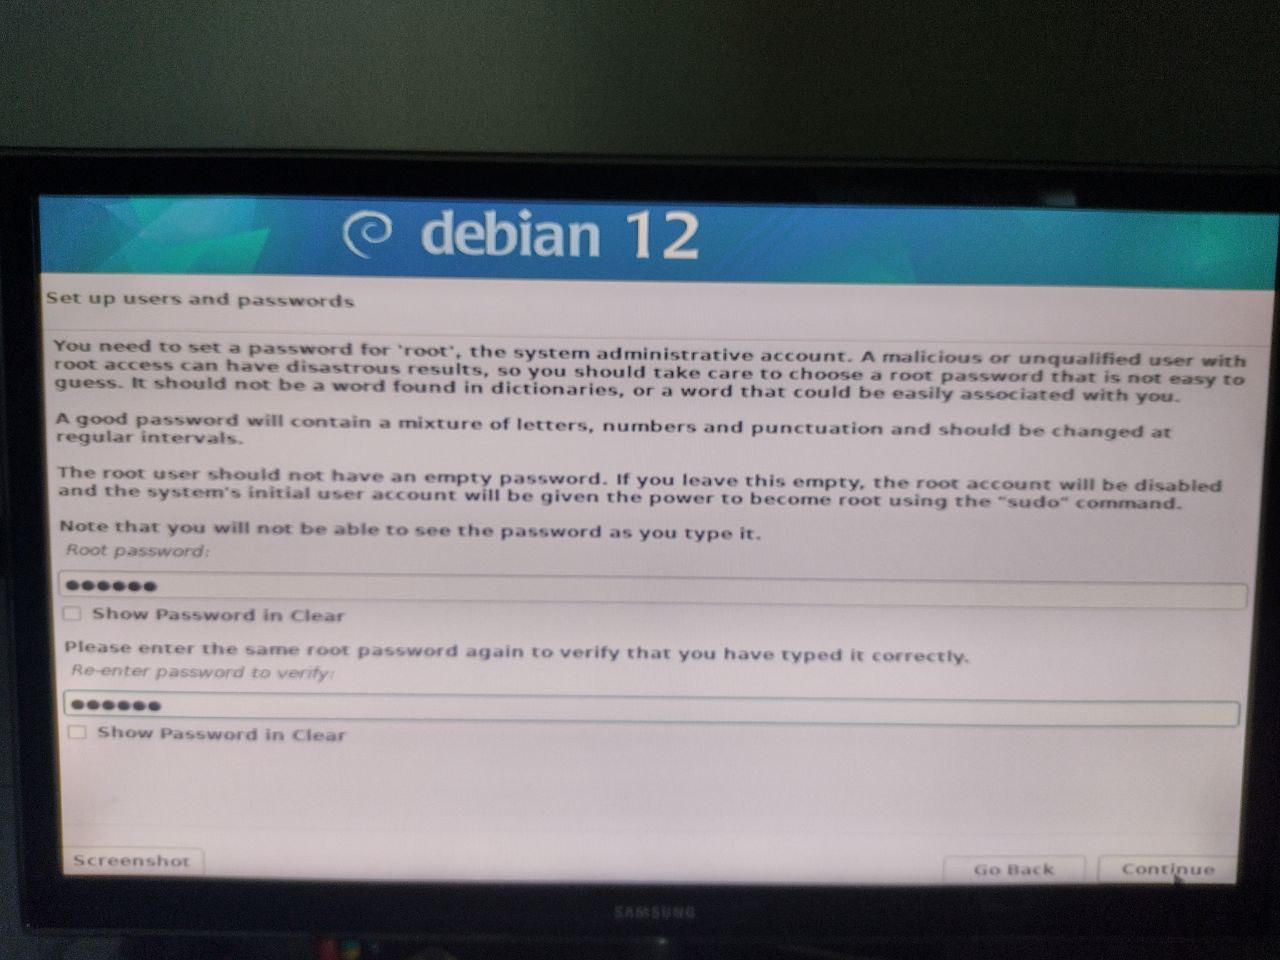
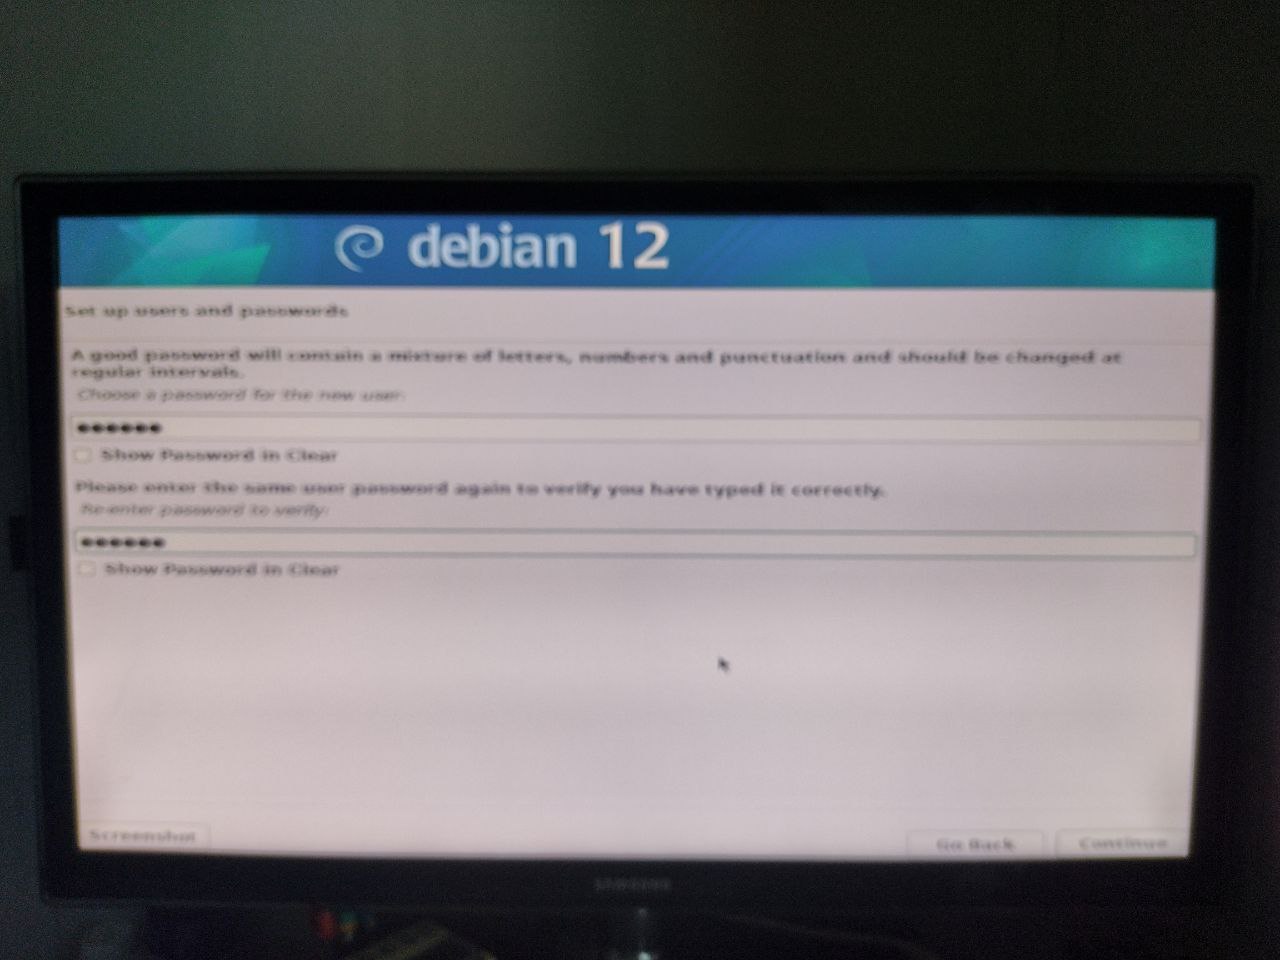
At this point Debian will ask you to select a password for the root user…
and to create a user with their respective password.

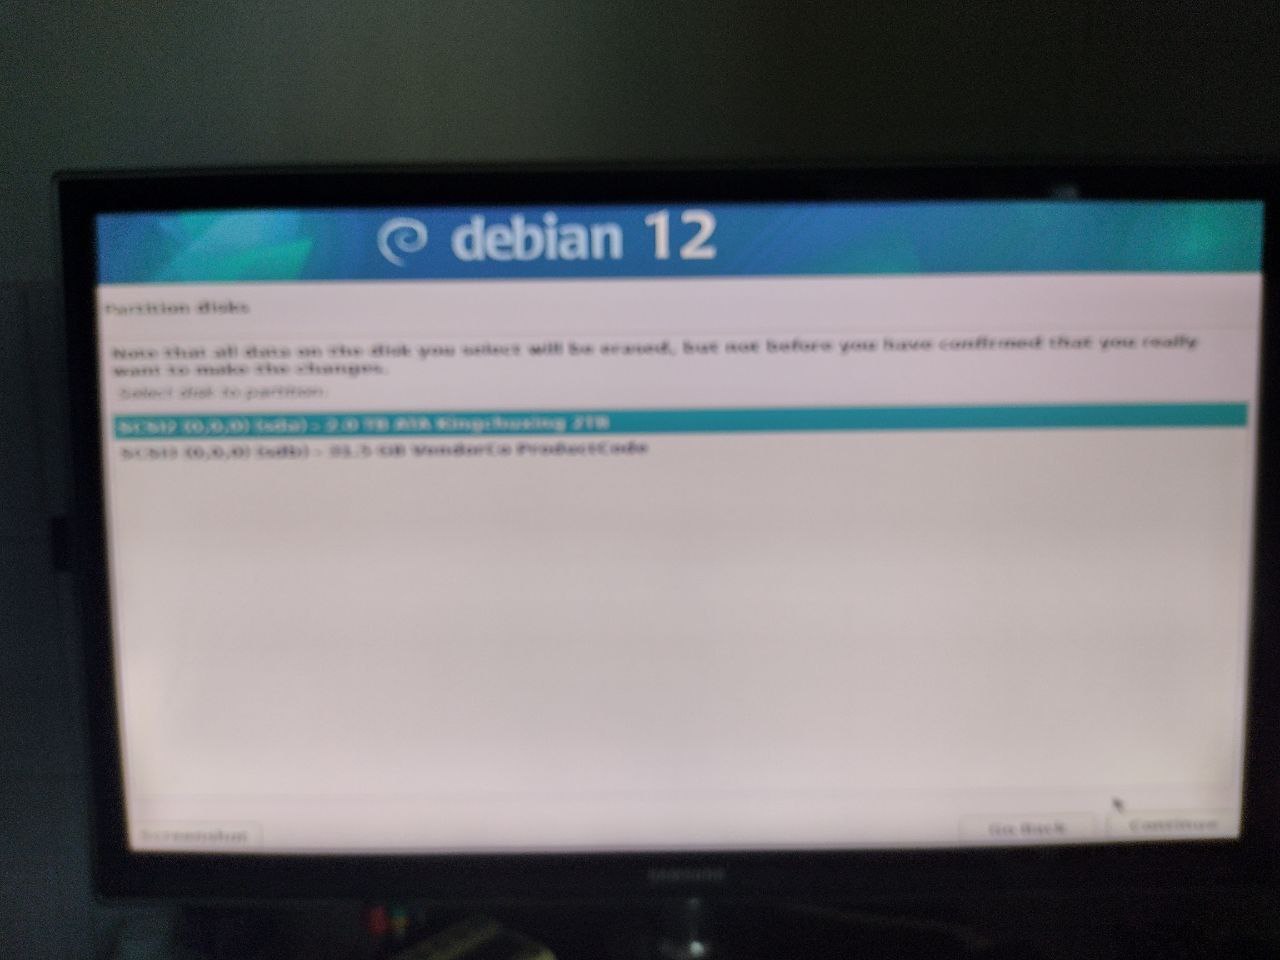
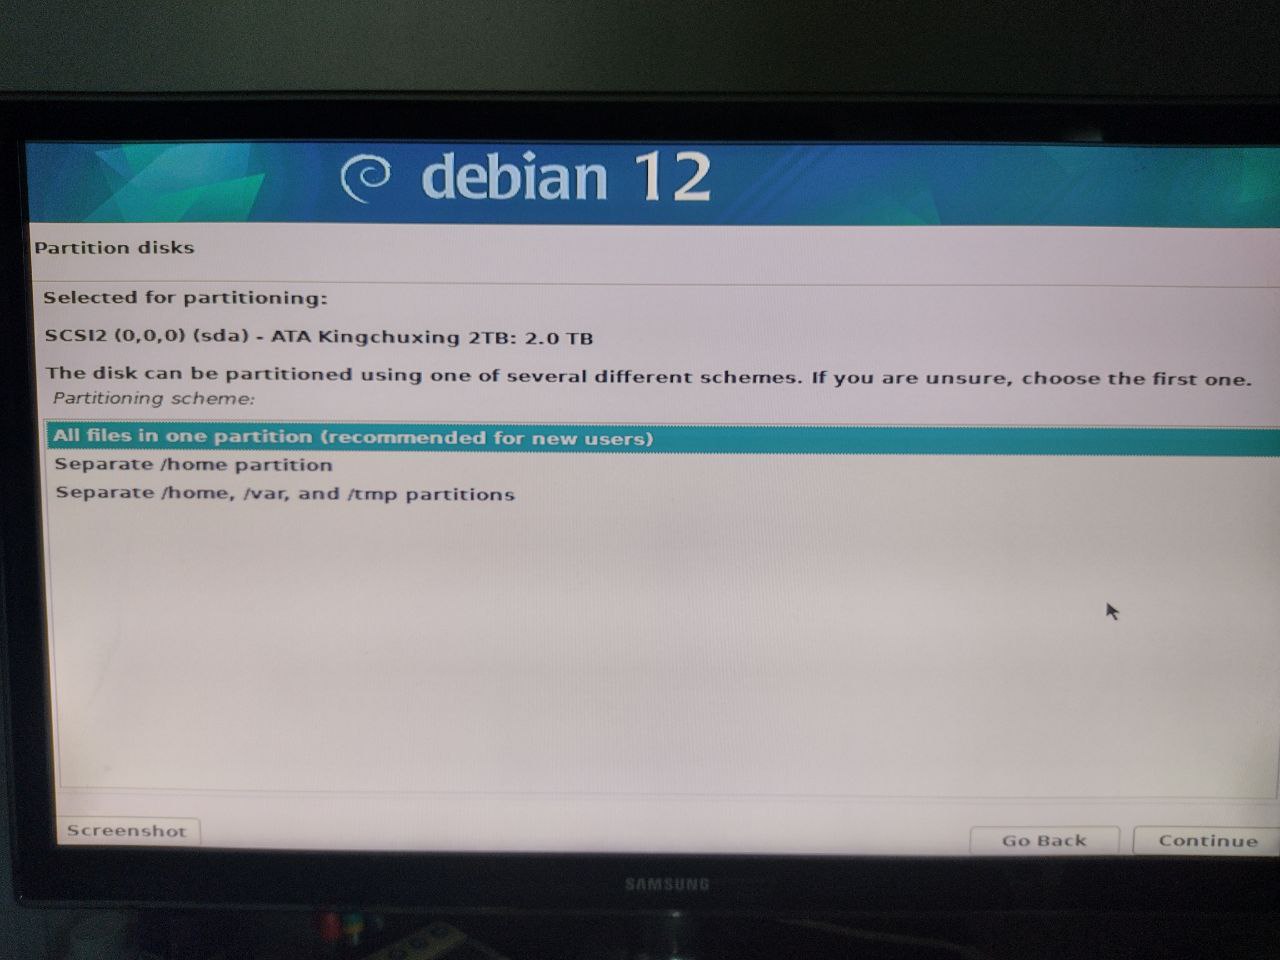
Now we need to choose the installation disk; we’ll use the entire disk and need to select the disk on which to perform the installation.
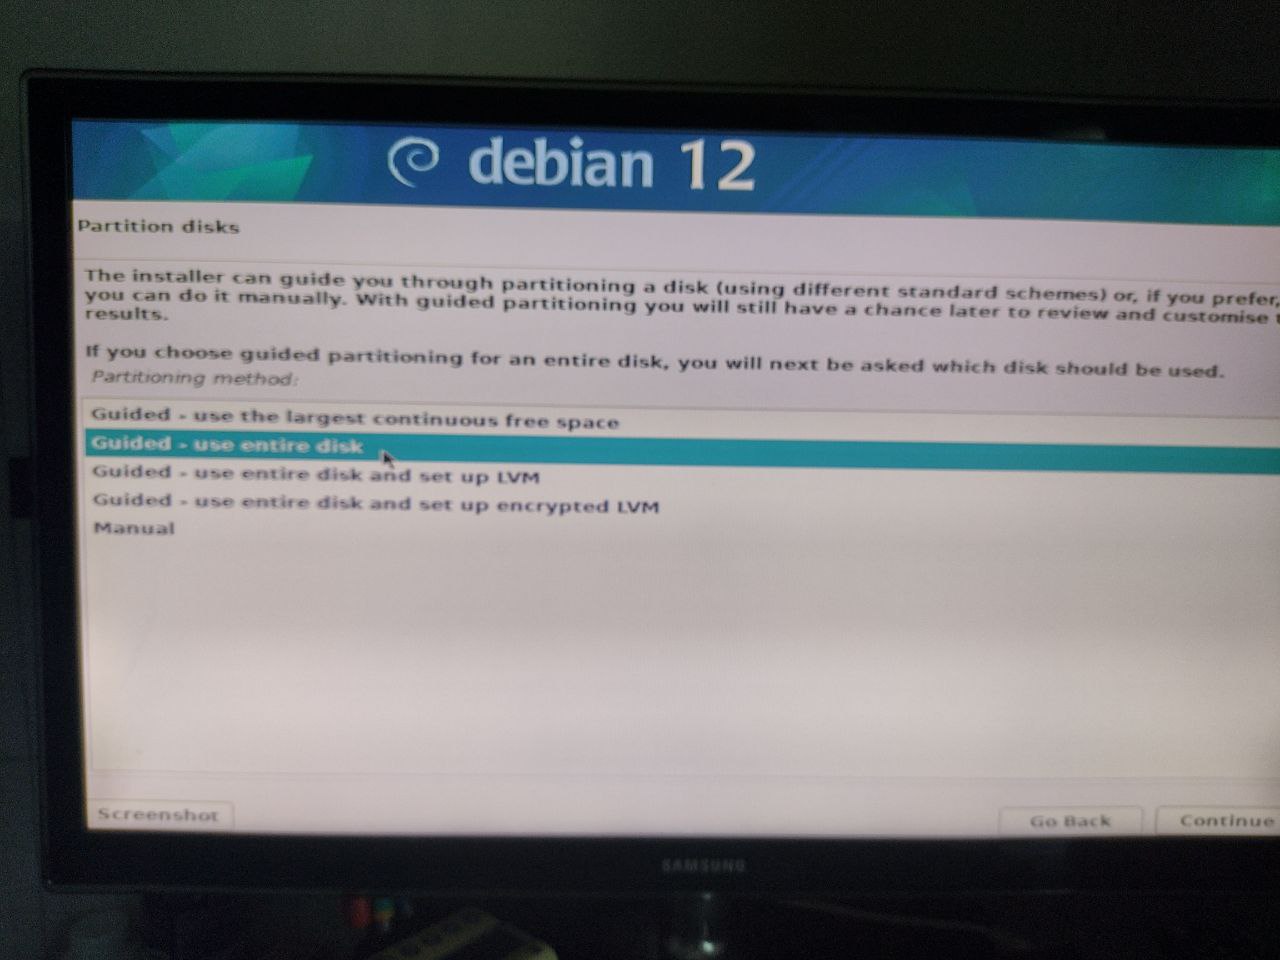
We then need to select the partition structure; for now we’ll leave everything in a single partition.
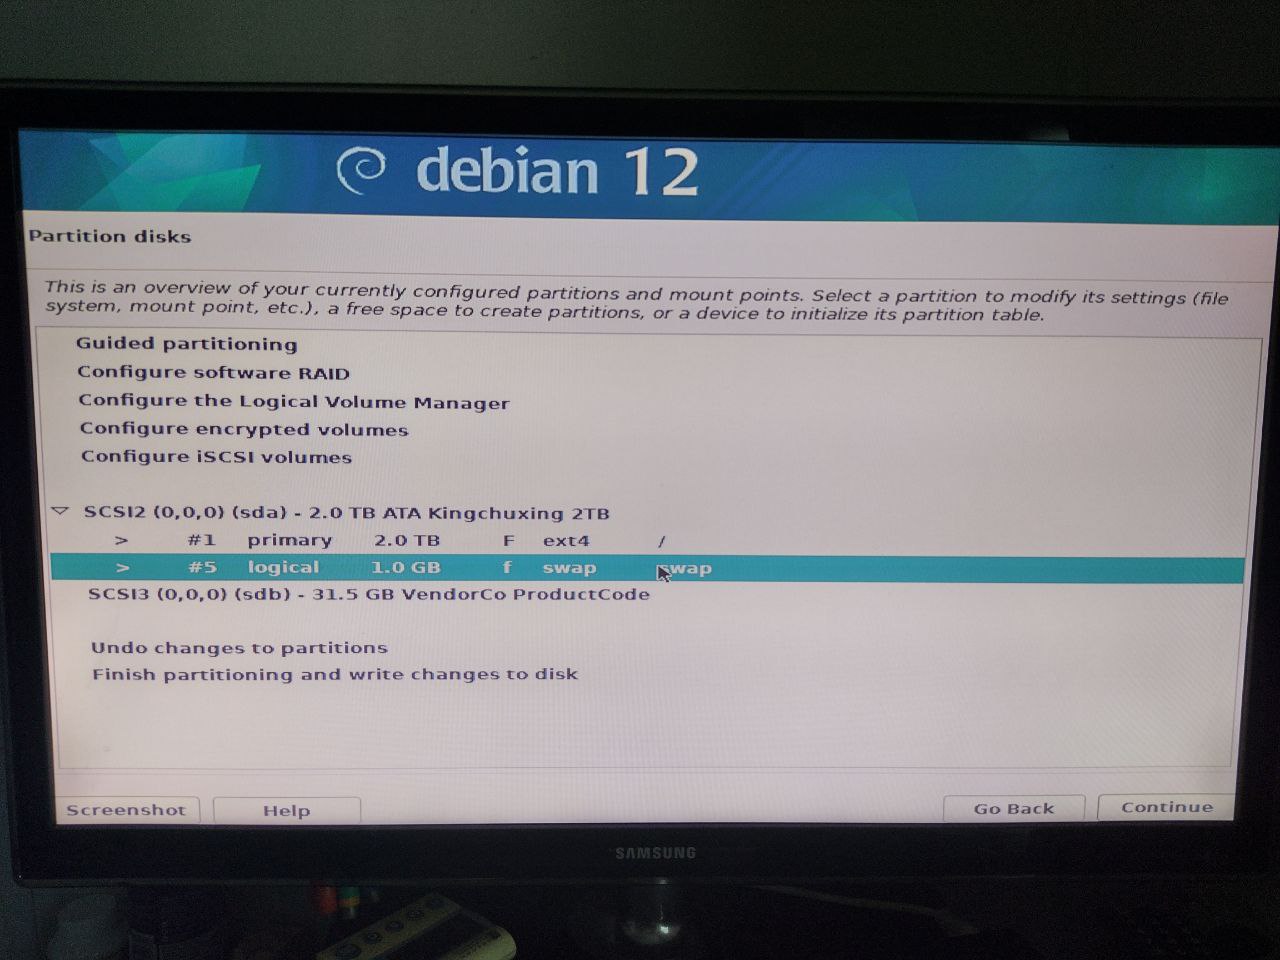
Debian proposes a partition table but… it has added swap which we don’t want, so let’s select it and remove it from the list.

Now that we’ve removed it, we can finally write our table.
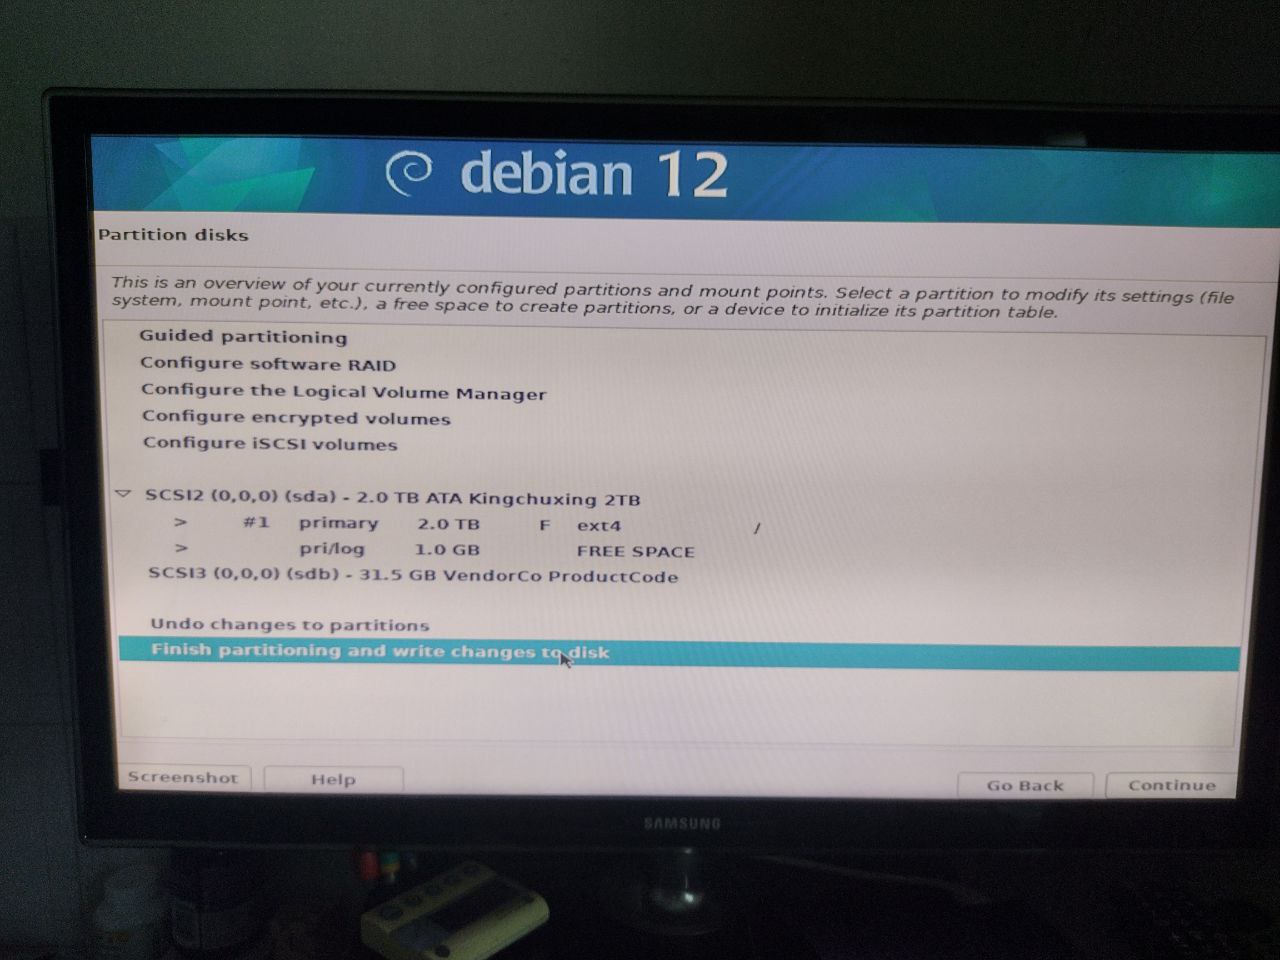
Debian would like to return to the partition table configuration but we decline the invitation.

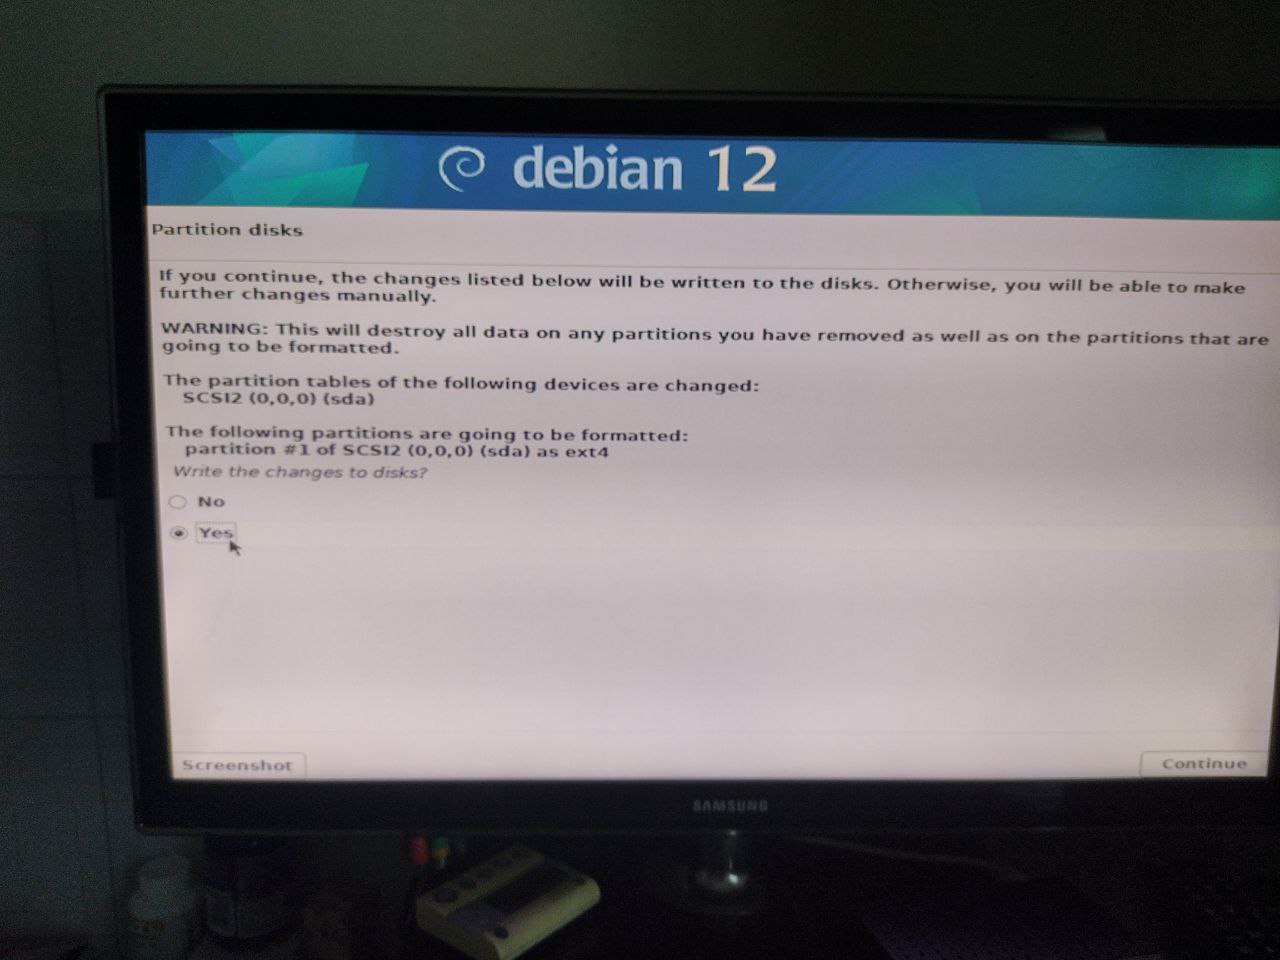
And we confirm the intention to write the updated table.
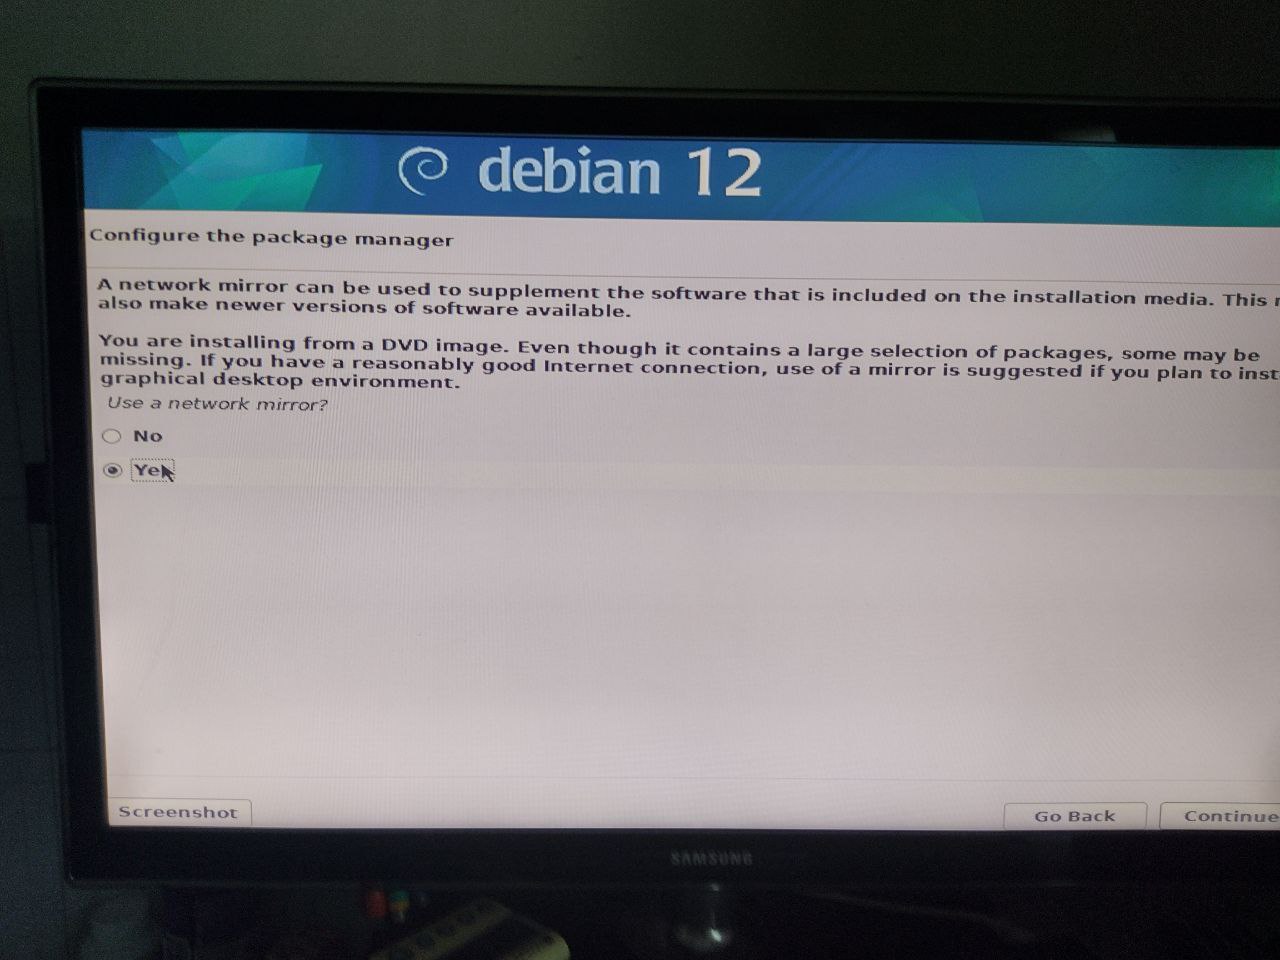
We’re now asked if we want to use a Debian mirror; we choose to use it.
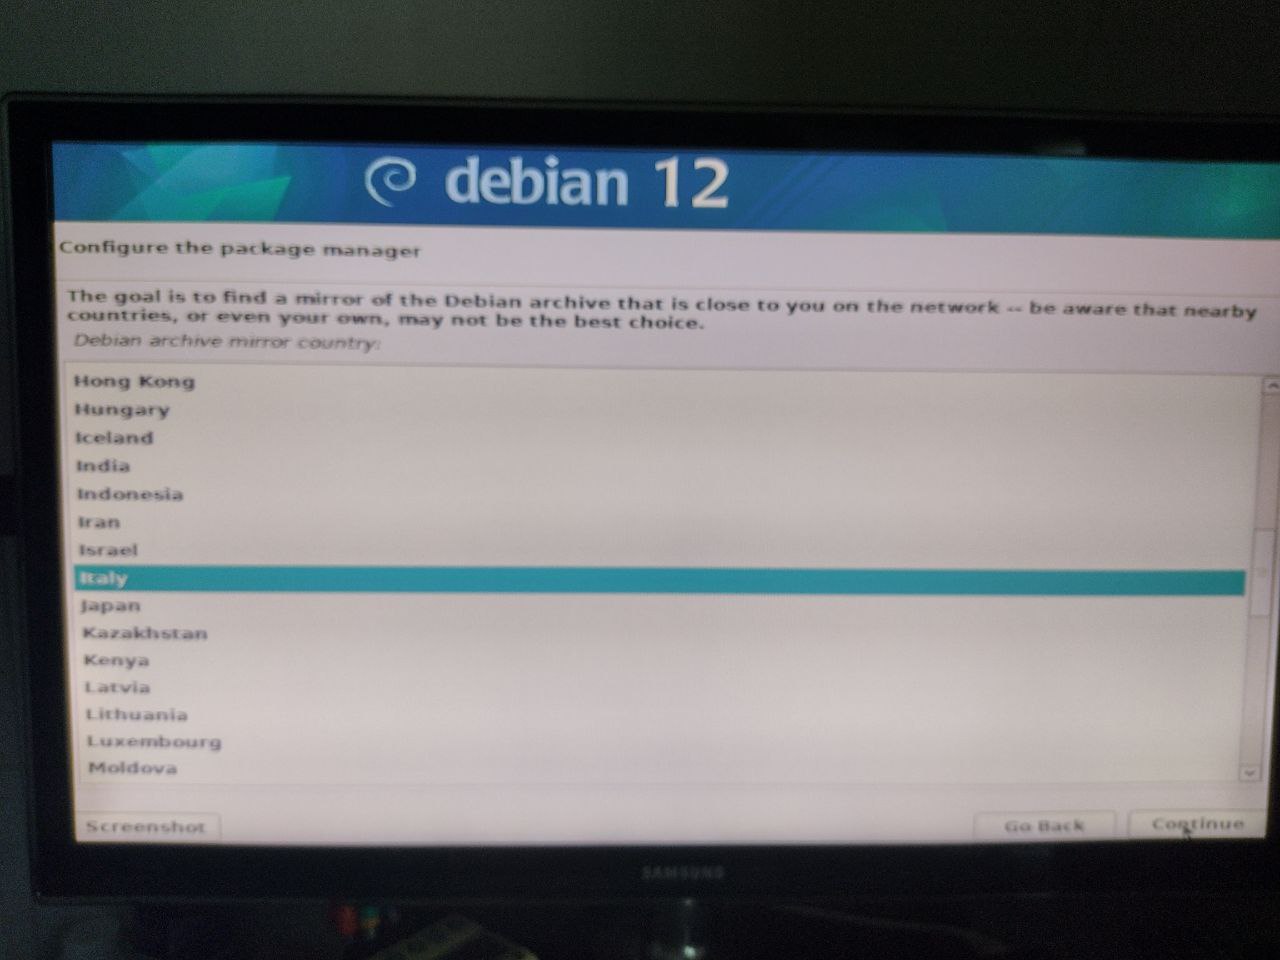
We choose our country.
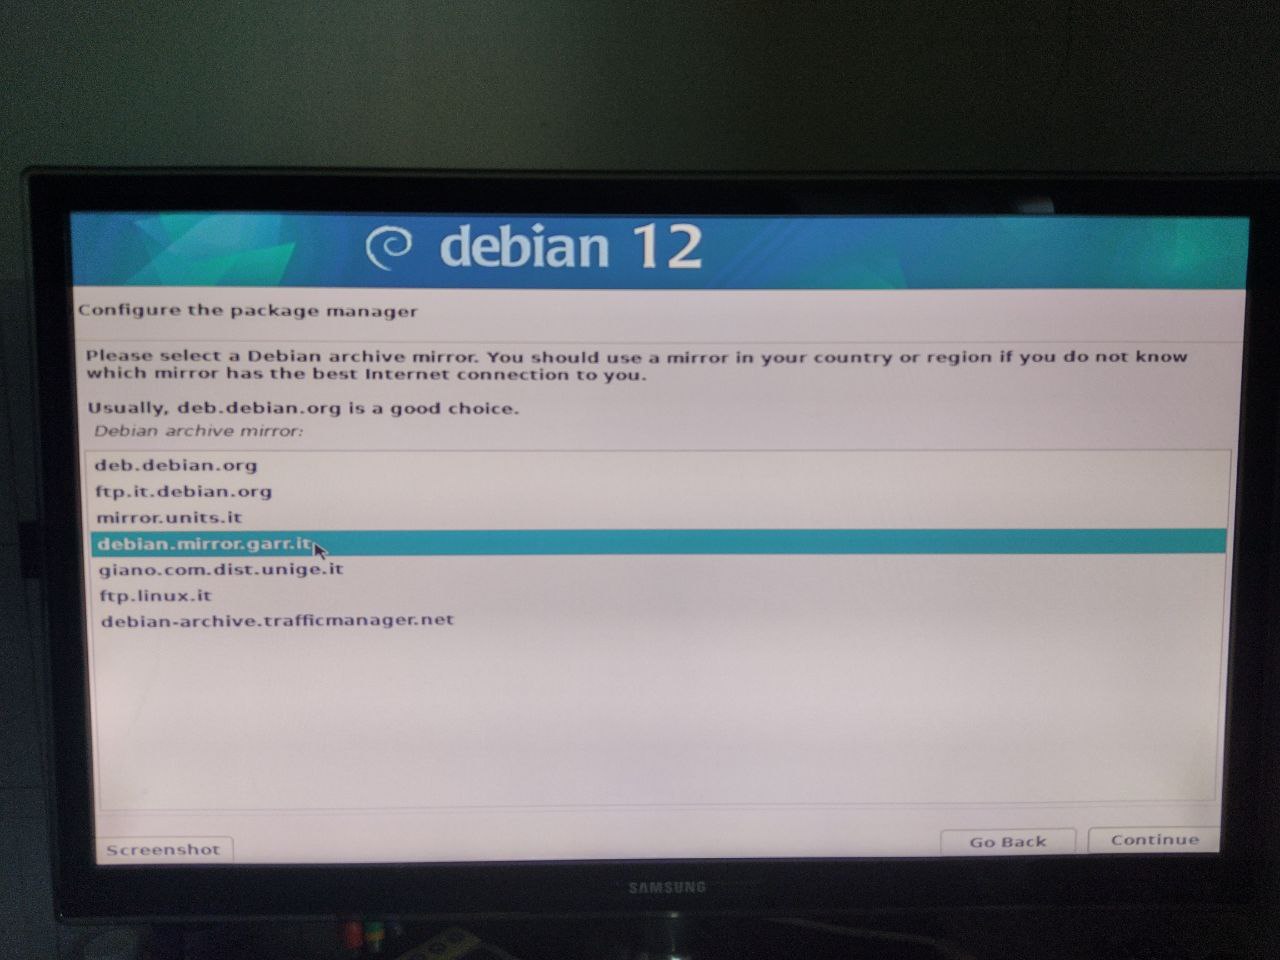
Usually the GARR mirror is fast and reliable; let’s use that.
I don’t have any proxy so I leave the field blank.

But what programs to install? Since we’re making a server, we disable the graphical environment (removing the first two checkmarks) and select SSH which we’ll need for remote access.

The installation starts.
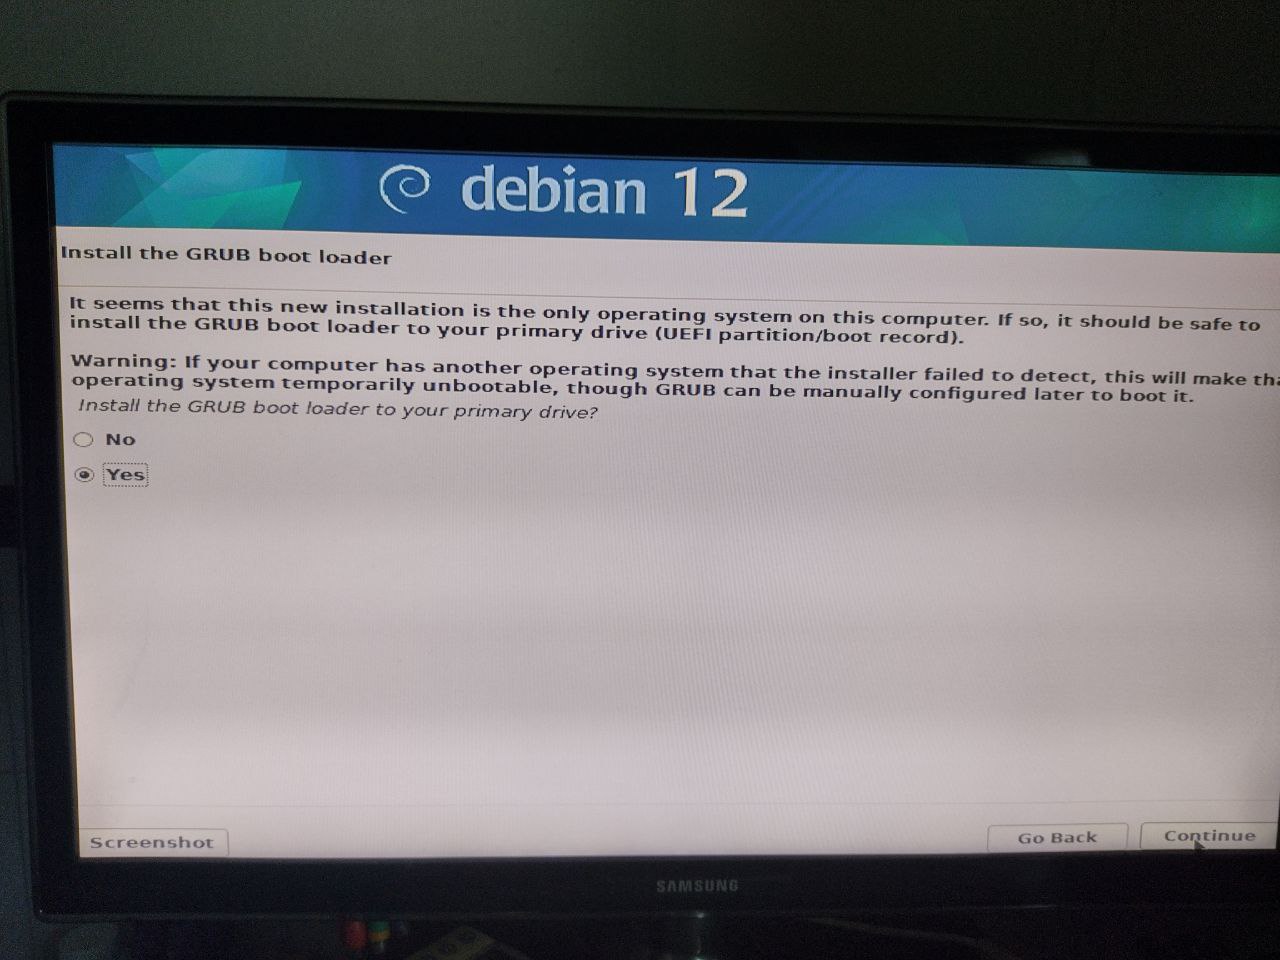
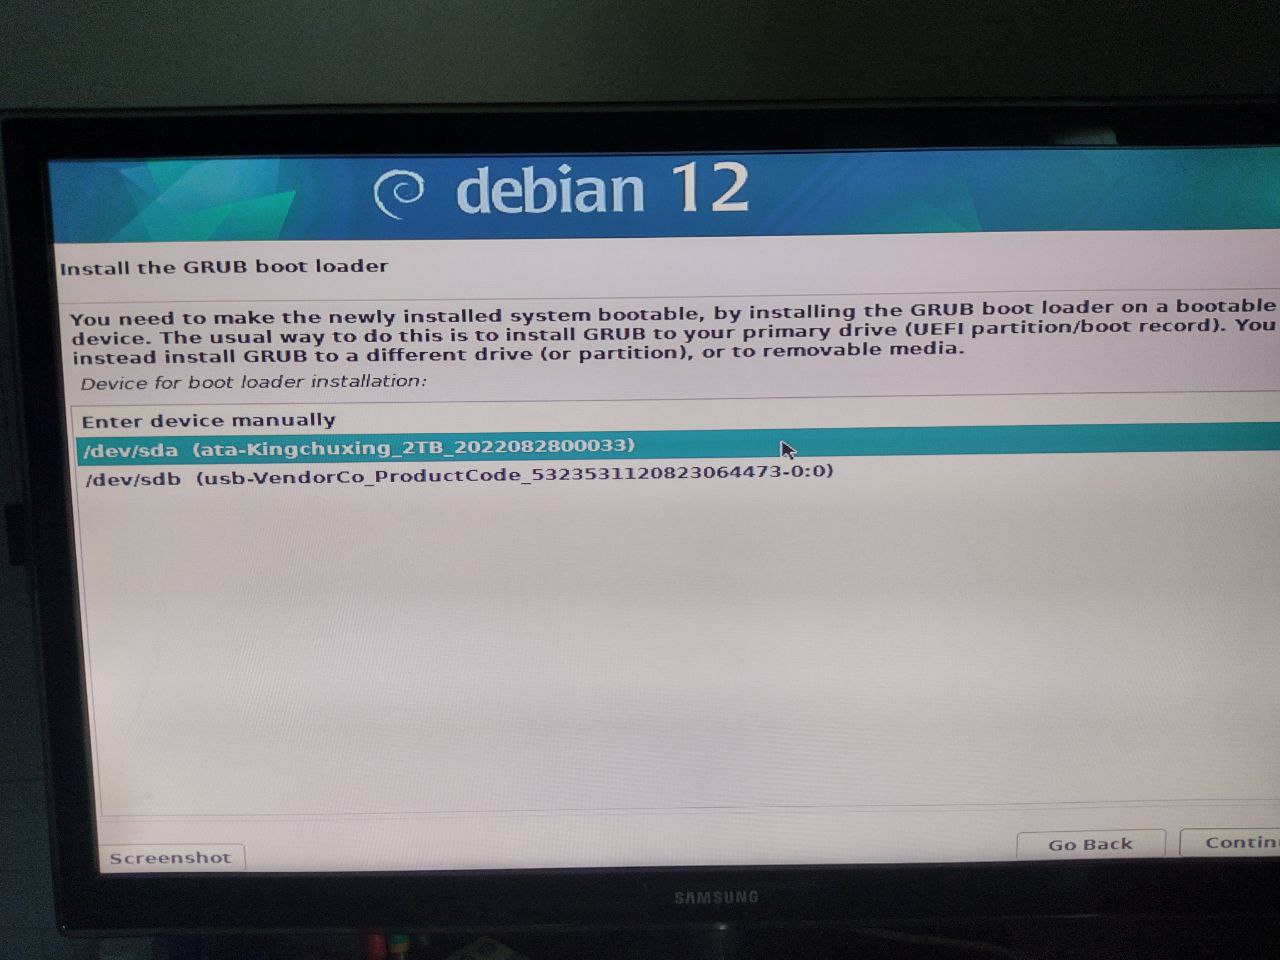
At the end we’re asked if we want to install grub which allows us to boot Linux; we answer affirmatively and choose the same disk on which we installed the operating system.
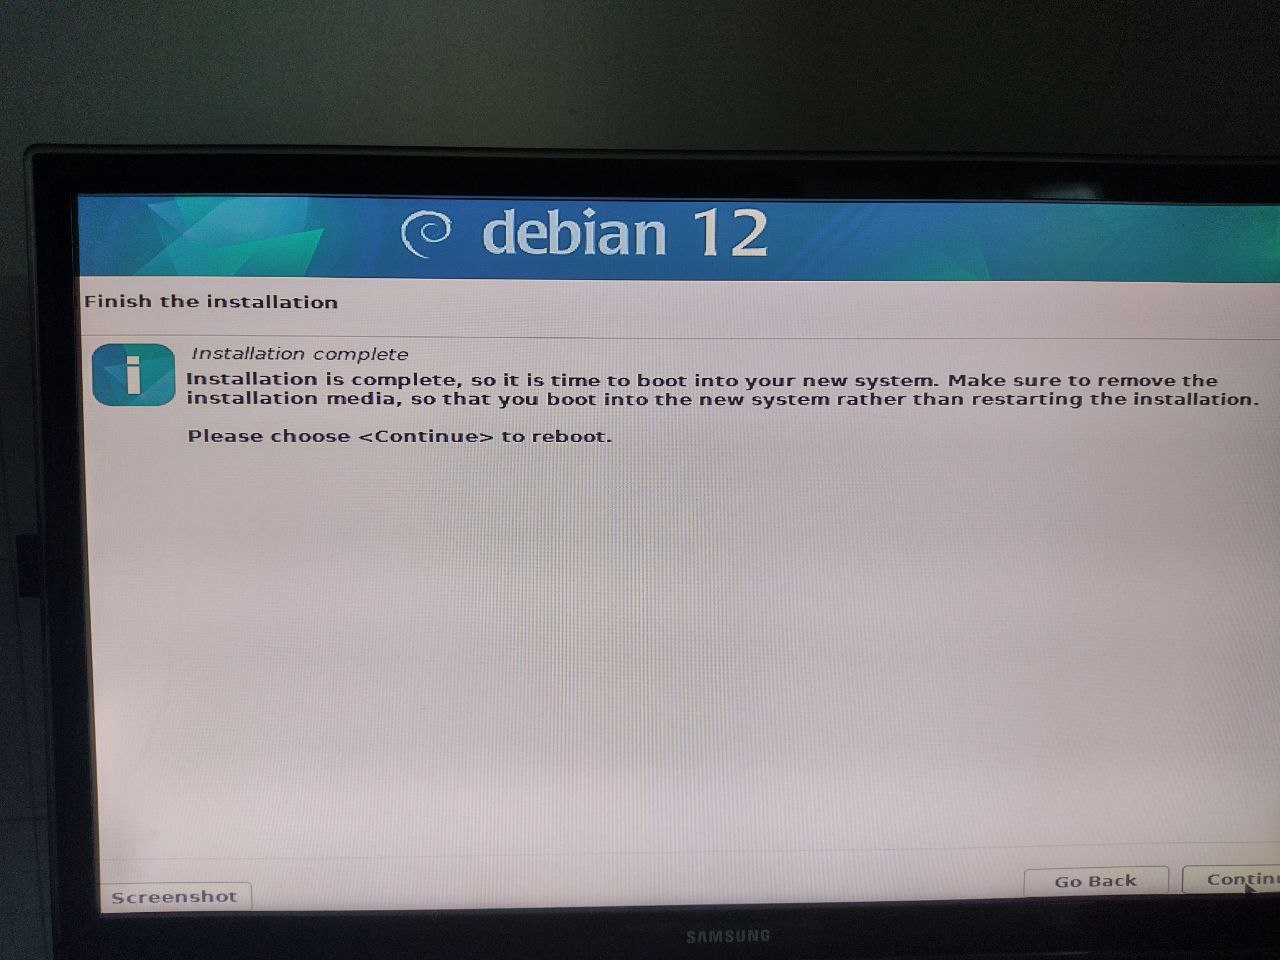
Yuhuuu we’re done, it’s time to remove the USB drive and proceed to restart the machine.
If everything worked correctly, we should find ourselves in front of a terminal asking us to log in with one of the profiles created during installation.
Configuration
Let’s connect
We connect to our server with ssh username@ip where username will be the name chosen during installation and ip the IP address of the computer on which we installed.
Obviously this step can be skipped if you install with a monitor and keyboard instead of connecting via network.
Note that Debian PROHIBITS you from connecting via ssh using superuser credentials (i.e., root).
Repository
Now let’s update the repositories.
We become superuser with the command su and typing the root password.
We edit the repository file with the command nano /etc/apt/sources.list and remove all present lines.
We add the following lines.
deb http://deb.debian.org/debian/ bookworm contrib main non-free non-free-firmware
# deb-src http://deb.debian.org/debian/ bookworm contrib main non-free non-free-firmware

deb http://deb.debian.org/debian/ bookworm-updates contrib main non-free non-free-firmware
# deb-src http://deb.debian.org/debian/ bookworm-updates contrib main non-free non-free-firmware

deb http://deb.debian.org/debian/ bookworm-proposed-updates contrib main non-free non-free-firmware
# deb-src http://deb.debian.org/debian/ bookworm-proposed-updates contrib main non-free non-free-firmware

deb http://deb.debian.org/debian/ bookworm-backports contrib main non-free non-free-firmware
# deb-src http://deb.debian.org/debian/ bookworm-backports contrib main non-free non-free-firmware

deb http://deb.debian.org/debian-security/ bookworm-security contrib main non-free non-free-firmware
# deb-src http://deb.debian.org/debian-security/ bookworm-security contrib main non-free non-free-firmware
We can then save the file by pressing CTRL+x and then y.
The command apt update allows us to check that everything went smoothly and update the package list.
Update the system
To update the system, simply run the following commands:
apt updateto update the package list,apt upgradeto update installed packages for which a new version exists.
Install tor and use it with ssh
To install tor, simply use the command apt install tor.
Once installed, we can configure it with the following command nano /etc/tor/torrc.
At the end of the file, we add the following lines.
HiddenServiceDir /var/lib/tor/hidden_service/
HiddenServicePort 22 127.0.0.1:22
And we restart tor with systemctl restart tor; now we can find our onion address with cat /var/lib/tor/hidden_service/hostname.
Using tor, we can now connect to our machine from anywhere in the world with torify ssh username@onionaddress.onion.
Program
The Debian installation is a repetitive lesson; here’s a list of those already held:
| Date | Notes |
|---|---|
| 240415-2200 | First lesson |